How to Create New Work on SwiftUI Gallery
A tutorial walks you through creating new work on SwiftUI Gallery
SwiftUI Gallery offers a streamlined process for showcasing your SwiftUI projects.
This tutorial will guide you through the steps to create and submit your work using our new work creation page.
Step 1: Accessing the New Work Page
You can navigate to the new work page by tap your user avatar at the top right, and click the Upload Work, then you'll be presented with a multi-step form that guides you through the submission process.

Step 2: Upload Demos
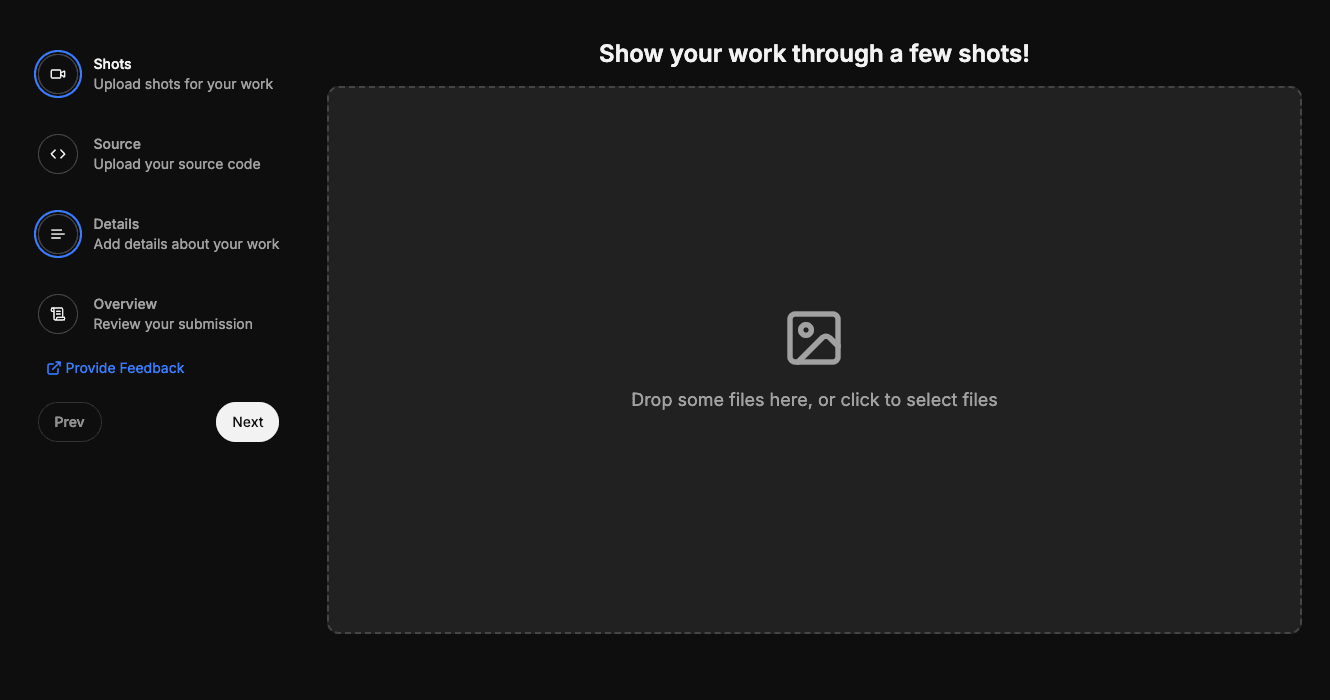
The first step is to upload demos of your work. This can include images or videos that showcase your SwiftUI project.
Drag and drop your files into the designated area, or click to select files from your device.
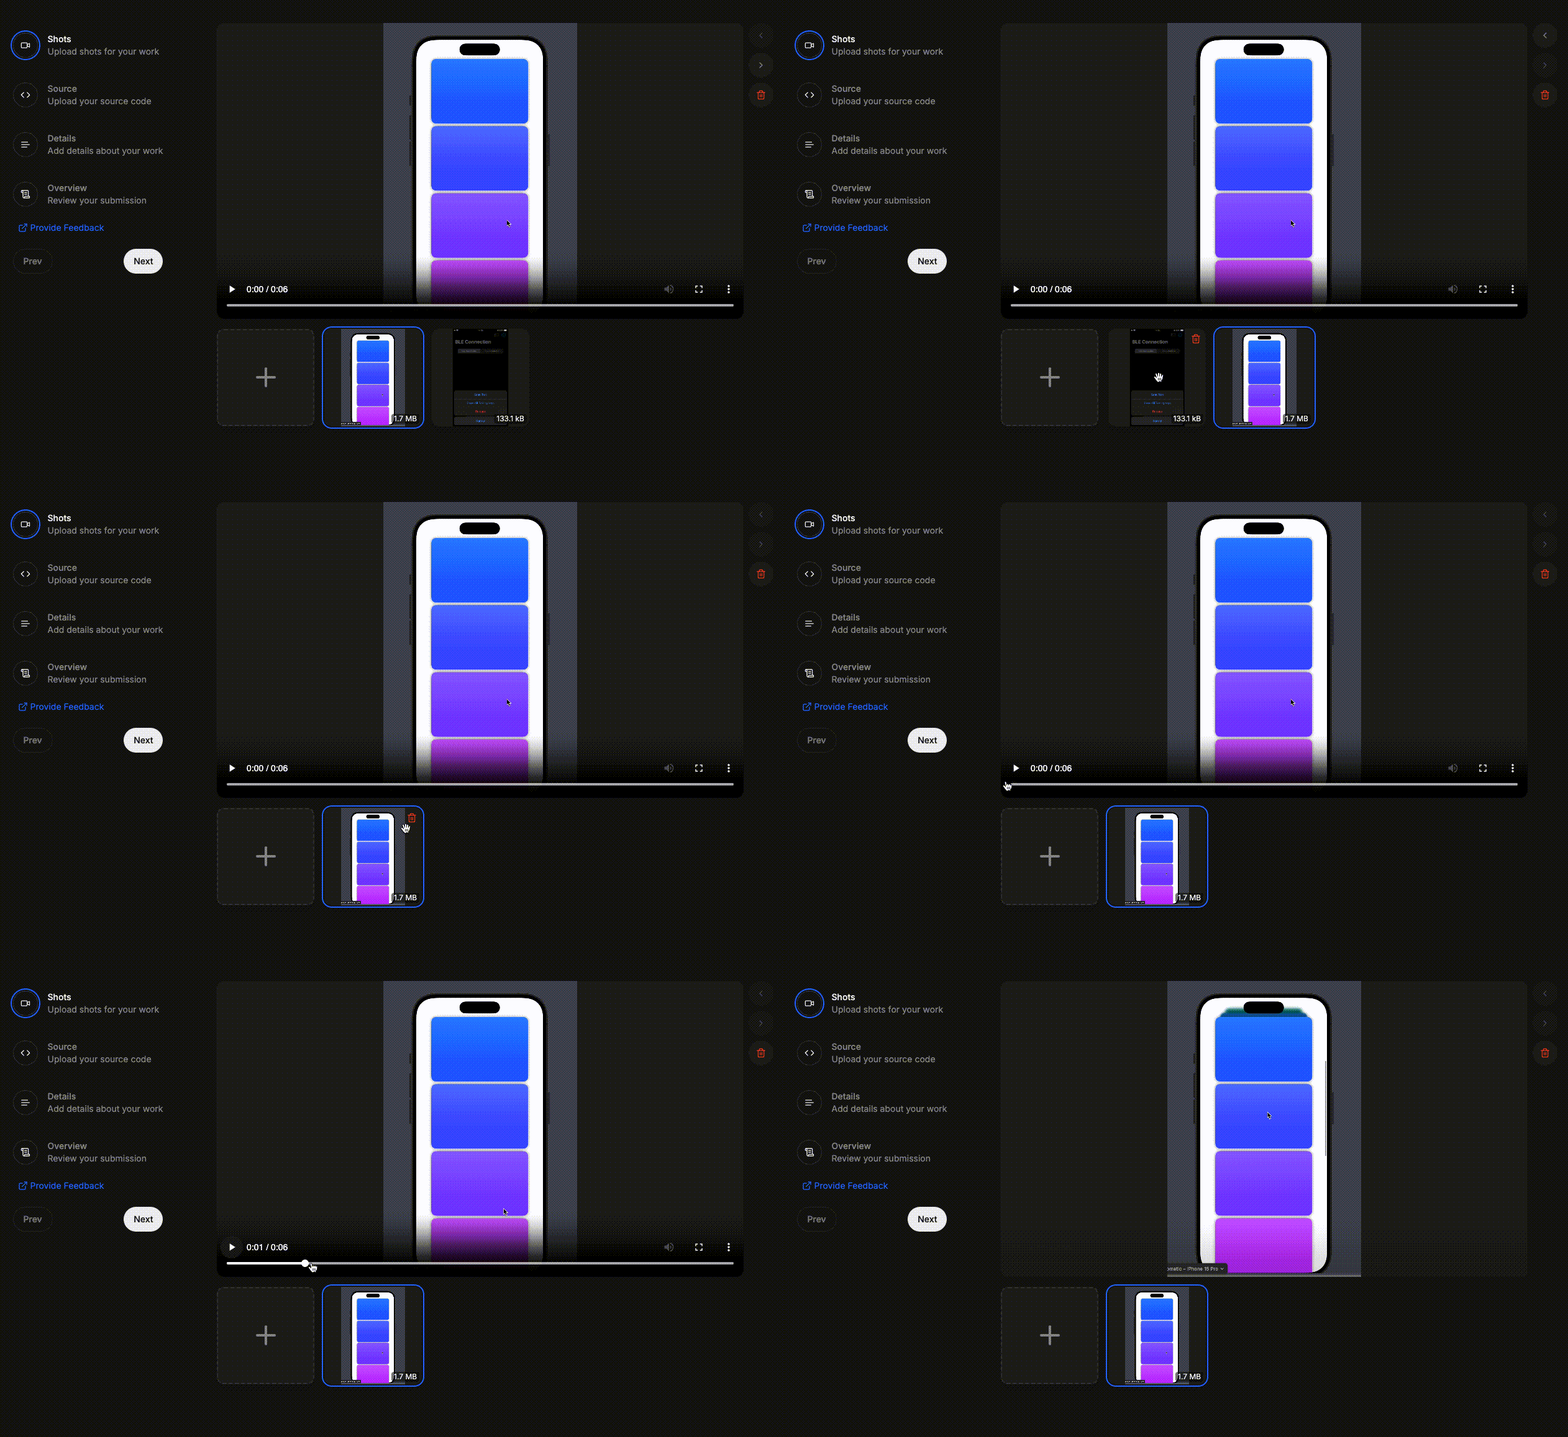
You can upload multiple files, which will be displayed in a grid below the main preview.
Use the arrow buttons to navigate through your uploaded media.
You can rearrange the order of your media by dragging and dropping the thumbnails.
To remove a file, click the trash icon on the thumbnail or use the delete button next to the main preview.
Remember, the total file size should not exceed 100MB.

Step 3: Add Source Code
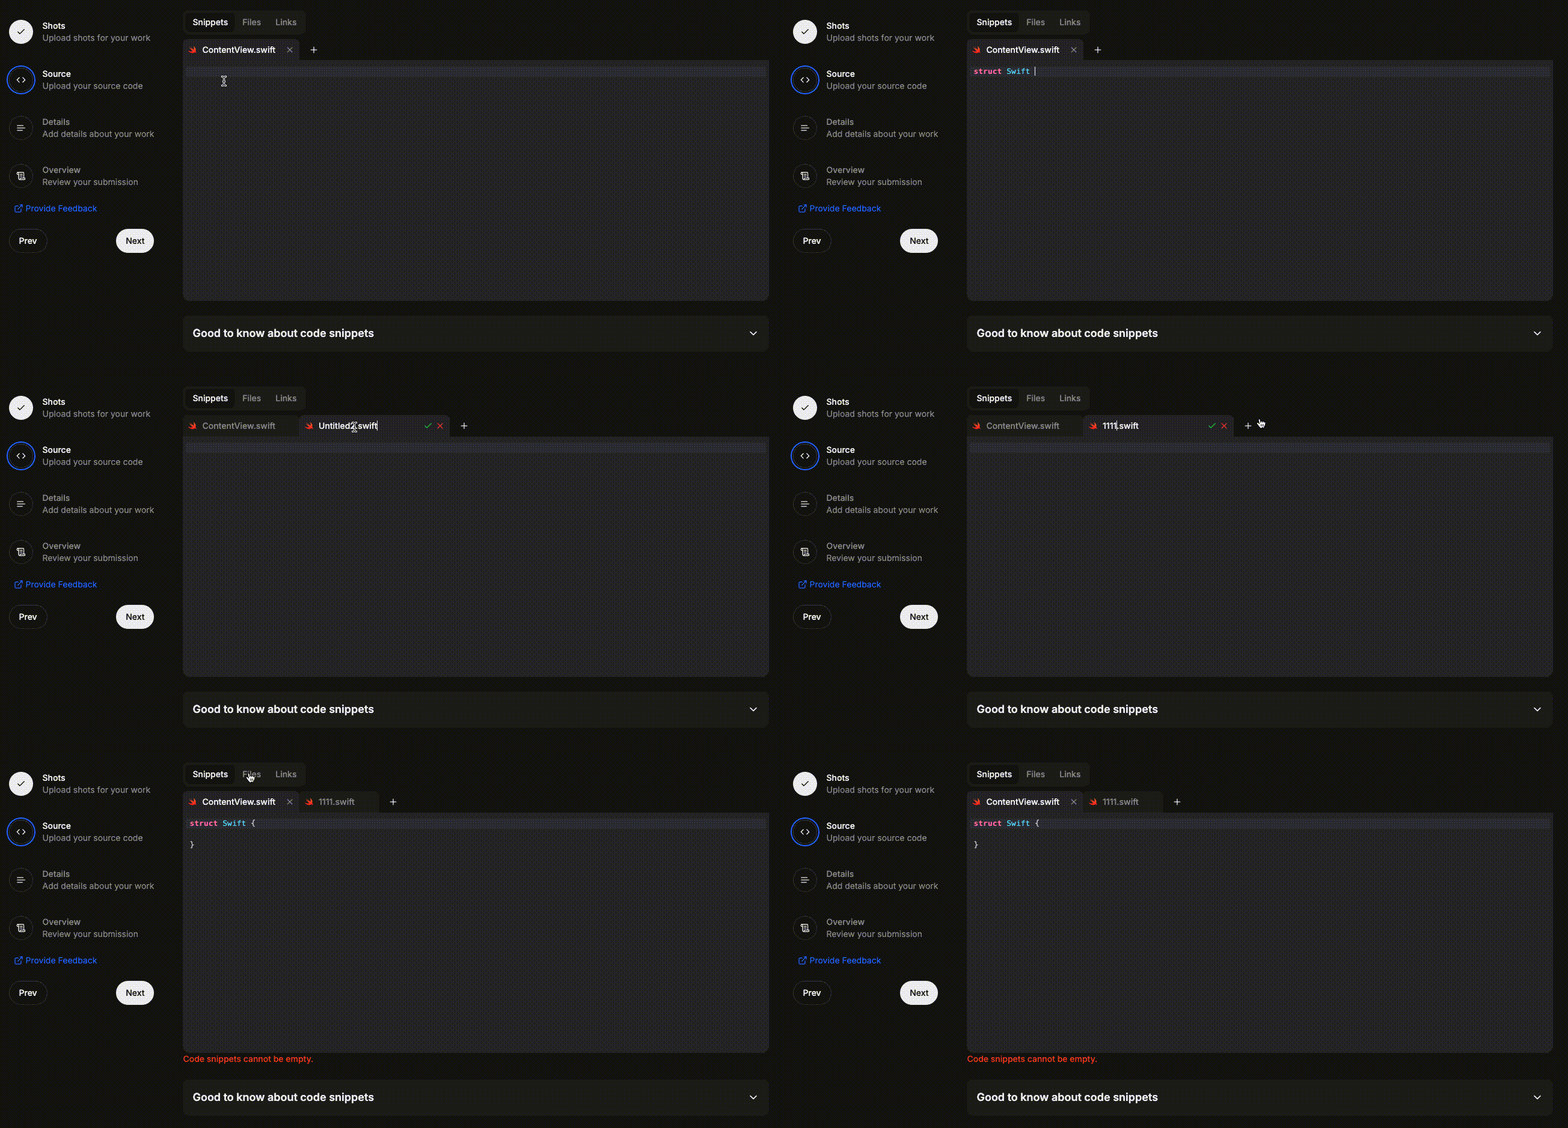
Next, you'll need to provide the source code for your project. You have three options:
Snippets: Paste code snippets directly into the provided editor.
Files: Upload source code files.
Links: Provide links to your source code (e.g., GitHub repository).
Choose the method that best suits your project and follow the prompts to add your source code.

Step 4: Fill in Details
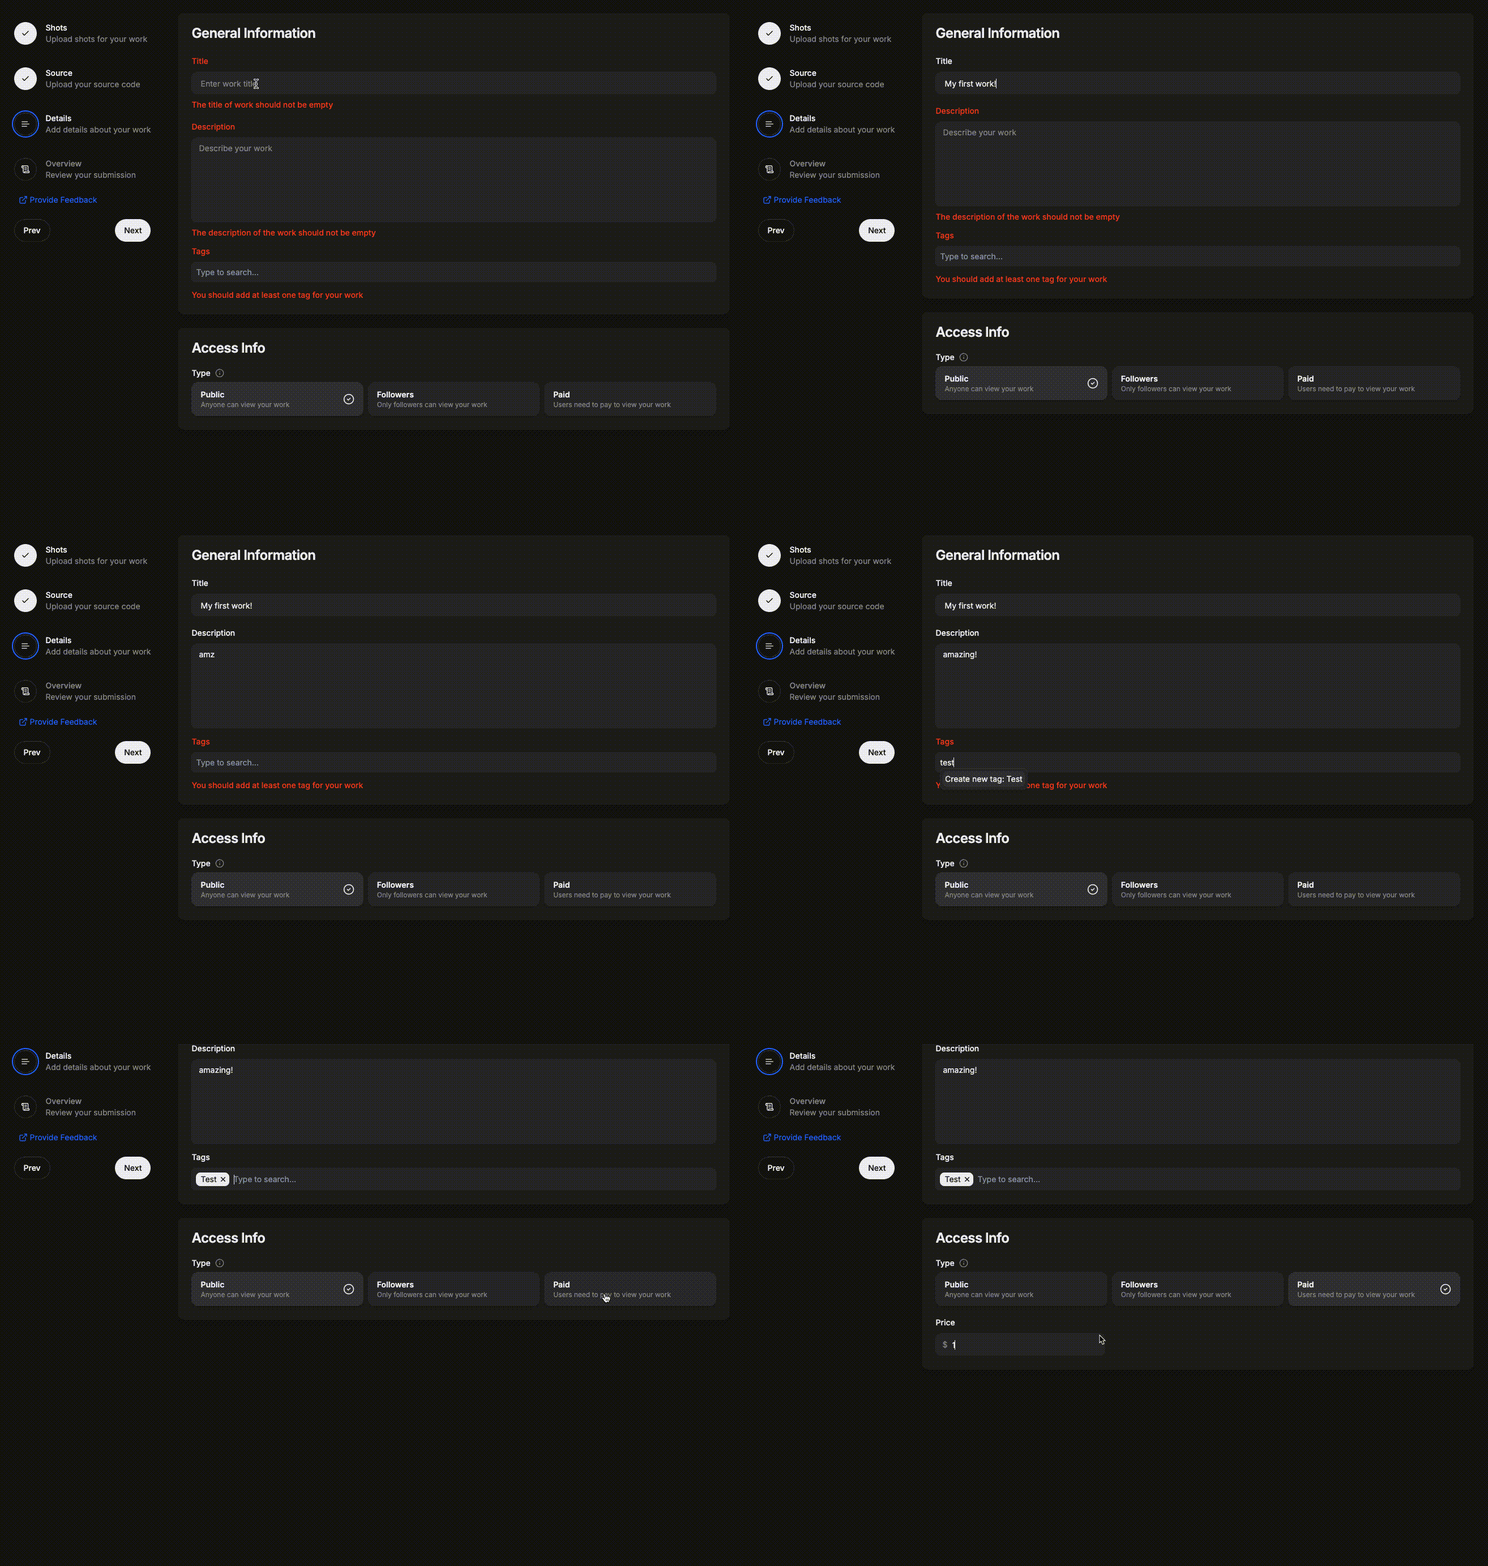
In this step, you'll provide more information about your work:
Title: Give your work a descriptive title.
Description: Write a detailed description of your project, highlighting its features and purpose.
Tags: Add relevant tags to help users find your work. You can select from existing tags or create new ones.
Decide how you want to share your work:
Public: Anyone can view your work.
Followers: Only your followers can view your work.
Paid: Users need to pay to access your work. (Note: This option requires a connected payment method.)If you choose the "Paid" option, you'll need to set a price for your work.

Step 5: Review and Submit
The final step allows you to review all the information you've provided:
Double-check your uploaded media, source code, details, and access settings.
If you need to make any changes, use the navigation on the left to go back to previous steps.
Once you're satisfied, click the "Submit" button to create your new work.
Success!
After successful submission, you'll see a congratulatory message with options to view your newly created work or share it on social media.
Tips for a Great Submission
Captivating Shots: Showcase your work with a series of visually striking shots. Make your first image particularly impressive to grab attention instantly!
Valuable Source Code: Provide complete, well-structured, and ready-to-run source code that offers genuine value to the community.
Strategic Tagging: Carefully select relevant tags to enhance your work's discoverability and reach the right audience.
By following these steps and tips, you'll be able to showcase your SwiftUI projects effectively on SwiftUI Gallery. Happy creating!